Developing a package
Let’s get started by creating and looking at the general layout of a package, and how it should look.
Package generator
The simplest way to start a package is to use the built-in package generator that ships with Pulsar. This generator is implemented as a separate package called package-generator.
You can run the generator by invoking the command palette and searching for "Generate Package". A dialog will appear asking you to name your new project. Whatever name you choose Pulsar will then create that directory and fill it out with a skeleton project and link it into your ~/.pulsar/packages %USERPROFILE%\.pulsar\packages directory so it’s loaded when you launch your editor next time.
Once this command has run you’ll see that Pulsar has created about a dozen files that make up the package. Let’s take a look at each of them to get an idea of how a package is structured.
my-package/
├─ grammars/
├─ keymaps/
├─ lib/
├─ menus/
├─ spec/
├─ snippets/
├─ styles/
├─ index.js
└─ package.json
Not every package will have (or need) all of these directories and the package generator doesn’t create snippets or grammars. Let’s see what some of these are so we can start messing with them.
package.json
Similar to Node modules, Pulsar packages contain a package.json file in their top-level directory. This file contains metadata about the package, such as the path to its "main" module, library dependencies, and manifests specifying the order in which its resources should be loaded.
In addition to some of the regular Node package.json keys available, Pulsar package.json files have their own additions.
main: the path to the JavaScript file that’s the entry point to your package. If this is missing, Pulsar will default to looking for anindex.jsorindex.coffee.styleSheets: an array of strings identifying the order of the style sheets your package needs to load. If not specified, style sheets in thestylesdirectory are added alphabetically.keymaps: an array of strings identifying the order of the key mappings your package needs to load. If not specified, mappings in thekeymapsdirectory are added alphabetically.menus: an array of strings identifying the order of the menu mappings your package needs to load. If not specified, mappings in themenusdirectory are added alphabetically.snippets: an array of strings identifying the order of the snippets your package needs to load. If not specified, snippets in thesnippetsdirectory are added alphabetically.activationCommands: an object identifying commands that trigger your package’s activation. The keys are CSS selectors; the values are arrays of strings identifying the command. The loading of your package is delayed until one of these events is triggered within the associated scope defined by the CSS selector. If not specified, theactivate()method of your main export will be called when your package is loaded.activationHooks: an array of strings identifying hooks that trigger your package’s activation. IfactivationHooksis present, the loading of your package is delayed until one of these hooks is triggered. Activation hooks include:core:loaded-shell-environmentfor when Pulsar has finished loading the shell environment variablesscope.name:root-scope-usedfor when a file first is opened from the specified language (e.g.source.ruby:root-scope-used)language-package-name:grammar-usedfor when a specific language package is used (e.g.,my-special-language-javascript:grammar-used)...:uri-openedfor when any valid URI has been opened. Change the...to the URI the package should be triggered by. (e.g. to activate when change log is openedatom://welcome/changeLog:uri-opened)...:file-name-openedfor when any specific file has been opened. Change the...to the full filename the package should be triggered by. (e.g. to activate whenrobots.txtis openedrobots.txt:file-name-opened)
workspaceOpeners: An array of strings identifying URIs that trigger your package’s activation. For example, suppose your package registers a custom opener foratom://my-custom-panel; by including that string inworkspaceOpeners, your package will defer its activation until that URI is opened.
The package.json made by the package generator looks like:
{
	"name": "your-package-name",
	"main": "./lib/your-package-name",
	"version": "0.0.0",
	"description": "A short description of your package",
	"activationCommands": {
		"atom-workspace": "your-package-name:toggle"
	},
	"repository": "https://github.com/pulsar-edit/your-package-name",
	"license": "MIT",
	"engines": {
		"atom": ">=1.0.0 <2.0.0"
	},
	"dependencies": {}
}
If we wanted activationHooks, we might add:
{
	"name": "your-package-name",
	"main": "./lib/your-package-name",
	"version": "0.0.0",
	"description": "A short description of your package",
	"activationHooks": [
		"language-javascript:grammar-used",
		"language-coffee-script:grammar-used"
	],
	"repository": "https://github.com/pulsar-edit/your-package-name",
	"license": "MIT",
	"engines": {
		"atom": ">=1.0.0 <2.0.0"
	},
	"dependencies": {}
}
One of the first things you should do is ensure that this information is filled out; name, description, repository URL, and license can all often be filled out immediately.
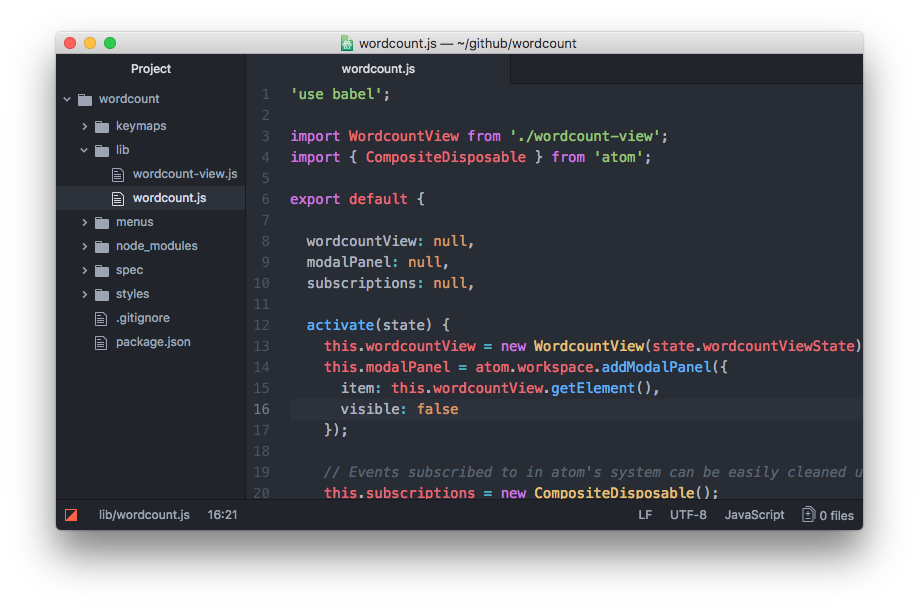
Source code
If you want to extend Pulsar’s behavior, your package should contain a single top-level module which you export from whichever file is indicated by the main key in your package.json file. In the package we just generated, the main package file is lib/your-package-name.js. The remainder of your code should be placed in the lib directory, and required from your top-level file. If the main key is not in your package.json file, it will look for index.js or index.coffee as the main entry point.
Your package’s top-level module is a singleton object that manages the lifecycle of your extensions to Pulsar. Even if your package creates ten different views and appends them to different parts of the DOM, it’s all managed from your top-level object.
Your package’s top-level module can implement the following basic methods:
activate(state): This optional method is called when your package is activated. It is passed the state data from the last time the window was serialized if your module implements theserialize()method. Use this to do initialization work when your package is started (like setting up DOM elements or binding events). If this method returns a promise the package will be considered loading until the promise resolves (or rejects).initialize(state): This optional method is similar toactivate()but is called earlier. Whereas activation occurs after the workspace has been deserialized (and can therefore happen after your package’s deserializers have been called),initialize()is guaranteed to be called before everything. Useactivate()if you want to be sure that the workspace is ready; useinitialize()if you need to do some setup prior to your deserializers or view providers being invoked.serialize(): This optional method is called when the window is shutting down, allowing you to return JSON to represent the state of your component. When the window is later restored, the data you returned is passed to your module’sactivatemethod so you can restore your view to where the user left off.deactivate(): This optional method is called when the window is shutting down and when the package is disabled. If your package is watching any files or holding external resources in any other way, release them here. You should also dispose of all subscriptions you’re holding on to.
Style sheets
Style sheets for your package should be placed in the styles directory. Any style sheets in this directory will be loaded and attached to the DOM when your package is activated. Style sheets can be written as CSS or Less, but Less is recommended.
Ideally, you won’t need much in the way of styling. Pulsar provides a standard set of components which define both the colors and UI elements for any package that fits into Pulsar seamlessly. You can view all of Pulsar’s UI components by opening the styleguide: open the command palette Ctrl+Shift+P Cmd+Shift+P and search for styleguide, or type Ctrl+Shift+G Cmd+Ctrl+Shift+G.
If you do need special styling, try to keep only structural styles in the package style sheets. If you must specify colors and sizing, these should be taken from the active theme’s ui-variables.less.
An optional styleSheets array in your package.json can list the style sheets by name to specify a loading order; otherwise, style sheets are loaded alphabetically.
Keymaps
You can provide key bindings for commonly used actions for your extension, especially if you’re also adding a new command. In our new package, we have a keymap filled in for us already in the keymaps/your-package-name.json file:
{
  "atom-workspace": {
    "ctrl-alt-o": "your-package-name:toggle"
  }
}
This means that if you press Alt+Ctrl+O, our package will run the your-package-name:toggle command. We’ll look at that code later, but if you want to change the default key mapping, you can do that in this file.
Keymaps are placed in the keymaps subdirectory. By default, all keymaps are loaded in alphabetical order. An optional keymaps array in your package.json can specify which keymaps to load and in what order.
Keybindings are executed by determining which element the keypress occurred on. In the example above, the your-package-name:toggle command is executed when pressing Alt+Ctrl+O on the atom-workspace element. Because the atom-workspace element is the parent of the entire Pulsar UI, this means the key combination will work anywhere in the application.
We’ll cover more advanced keybinding stuff a bit later in Keymaps in-depth.
Menus
Menus are placed in the menus subdirectory. This defines menu elements like what pops up when you right click a context-menu or would go in the application menu to trigger functionality in your package.
By default, all menus are loaded in alphabetical order. An optional menus array in your package.json can specify which menus to load and in what order.
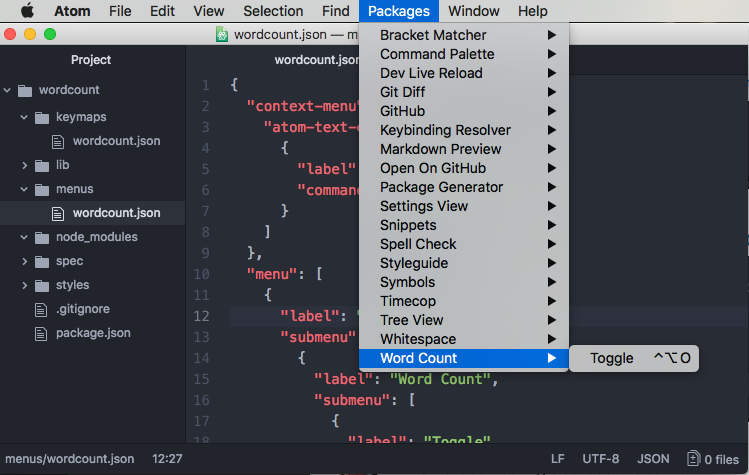
Application menu
It’s recommended that you create an application menu item under the Packages menu for common actions with your package that aren’t tied to a specific element. If we look in the menus/your-package-name.json file that was generated for us, we’ll see a section that looks like this:
"menu": [
  {
    "label": "Packages",
    "submenu": [
      {
        "label": "Your Package Name",
        "submenu": [
          {
            "label": "Toggle",
            "command": "your-package-name:toggle"
          }
        ]
      }
    ]
  }
]
This section puts a "Toggle" menu item under a menu group named "Your Package Name" in the "Packages" menu.
When you select that menu item, it will run the your-package-name:toggle command, which we’ll look at in a bit.
The menu templates you specify are merged with all other templates provided by other packages in the order which they were loaded.
Context menu
It’s recommended to specify a context menu item for commands that are linked to specific parts of the interface. In our menus/your-package-name.json file, we can see an auto-generated section that looks like this:
"context-menu": {
    "atom-text-editor": [
      {
        "label": "Toggle your-package-name",
        "command": "your-package-name:toggle"
      }
    ]
  }
This adds a "Toggle your-package-name" menu option to the menu that pops up when you right-click in an Pulsar text editor pane.
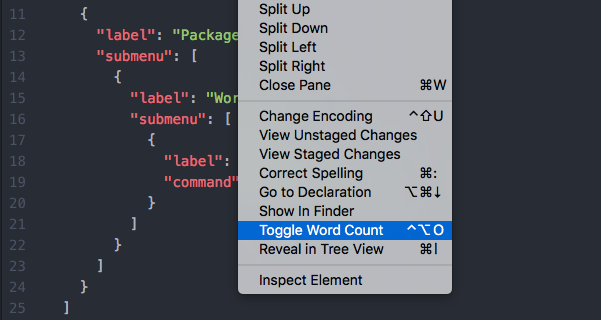
When you click that it will again run the your-package-name:toggle method in your code.
Context menus are created by determining which element was selected and then adding all of the menu items whose selectors match that element (in the order which they were loaded). The process is then repeated for the elements until reaching the top of the DOM tree.
You can also add separators and submenus to your context menus. To add a submenu, provide a submenu key instead of a command. To add a separator, add an item with a single type: 'separator' key/value pair. For instance, you could do something like this:
{
  "context-menu": {
    "atom-workspace": [
      {
        "label": "Text",
        "submenu": [
          {
            "label": "Inspect Element",
            "command": "core:inspect"
          },
          {
            "type": "separator"
          },
          {
            "label": "Select All",
            "command": "core:select-all"
          },
          {
            "type": "separator"
          },
          {
            "label": "Delete Selected Text",
            "command": "core:delete"
          }
        ]
      }
    ]
  }
}
Basic debugging
One of the cool things about Pulsar being built on Chromium is that you can use some of the same debugging tools available to you that you have when doing web development.
To open up the Developer Console, press Ctrl+Shift+I Alt+Cmd+I or choose the menu option View > Developer > Toggle Developer Tools.
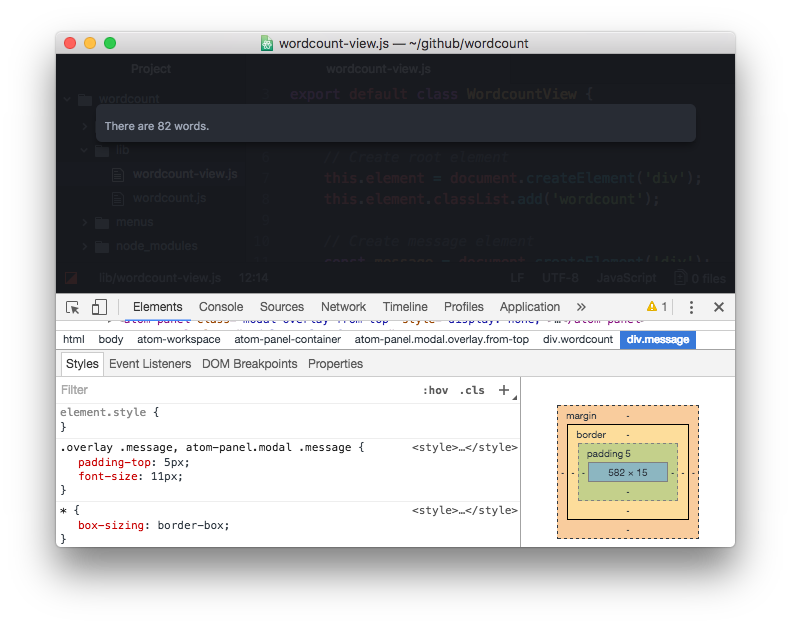
From here you can inspect objects, run code and view console output just as though you were debugging a web site.
Testing
Your package should have tests, and if they’re placed in the spec directory, they can be run by Pulsar.
Under the hood, Jasmine v1.3 executes your tests, so you can assume that any DSL available there is also available to your package.
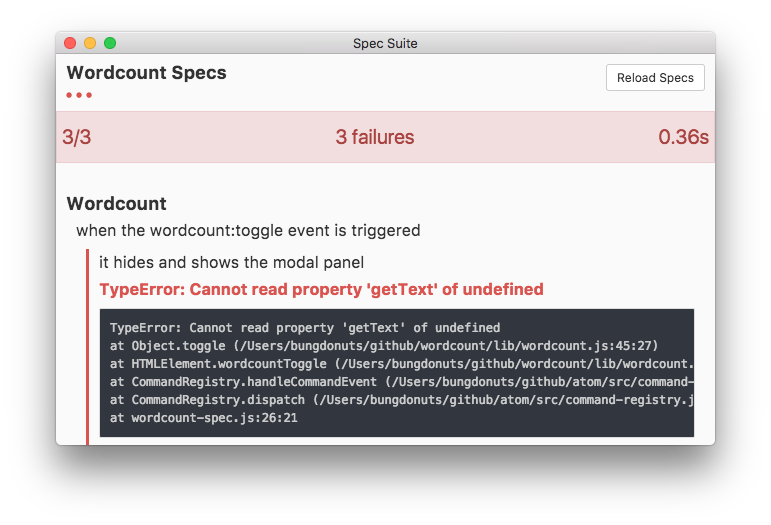
Running tests
Once you’ve got your test suite written, you can run it by pressing Ctrl+Shift+YAlt+Cmd+Ctrl+P or via the View > Developer > Run Package Specs menu. Our generated package comes with an example test suite, so you can run this right away to see what happens.
You can also use the pulsar --test spec command to run them from the command line. It prints the test output and results to the console and returns the proper status code depending on whether the tests passed or failed.