Basics
Now that Pulsar is installed on your system, let’s fire it up, configure it and get acquainted with the editor.
When you launch Pulsar for the first time, you should get a screen that looks like this:

This is the Pulsar welcome screen (powered by the welcome package) and it gives you a pretty good starting point for how to get started with the editor. Once you get comfortable, you can uncheck “Show Welcome Guide when opening Pulsar” to stop seeing it on every launch.
Terminology
Below is a list of some useful terms used with regard to Pulsar.
Buffer
A buffer is the text content of a file in Pulsar. It’s basically the same as a file for most descriptions, but it’s the version Pulsar has in memory. For instance, you can change the text of a buffer and it isn’t written to its associated file until you save it.
Command
A command is a bit of functionality in Pulsar that can be triggered by the user either through a keybinding or a menu item.
Dock
Docks are collapsible pane containers that attach to the left, right, and bottom sides of the Pulsar window. They hold panels such as the tree view and the Git and GitHub panels.
Key combination
A key combination is some combination or sequence of keys that are pressed to perform a task.
Examples:
- A
- Ctrl+Enter
- Ctrl+K Right
Key sequence
A key sequence is a special case of a key combination. It is a key combination that consists of keys that must be pressed and released in sequence. Ctrl+K Down is a key sequence: first press and release Ctrl+K, then press Down.
Alt+S is not a key sequence because it is two keys that are pressed and released together rather than in succession.
Keybinding
A keybinding is a mapping of a key combination, such as Ctrl+Enter, to a Pulsar command.
Keymap
A keymap is a collection of keybindings. It can also refer to a file or files containing keybindings for a Pulsar package or Pulsar itself.
Package
A package is what other editors might call an extension or a plugin. You can read all about packages on the Pulsar packages page.
Pane
A pane is a visual section of the editor space. Each pane can hold multiple pane items. There is always at least one pane in each Pulsar window.
Pane container
A pane container is a section of the Pulsar UI that can contain multiple panes.
Pane item
A pane item is a view, often an editor, that is displayed within a pane. In the default configuration of Pulsar, pane items are represented by tabs at the top of each pane.
Here are some pane items you might encounter that aren’t code editors:
- the results of a project-wide find (via the find-and-replace package)
- the settings view
- the diff views from the github package that show you the difference between two versions of the same file
Panel
A panel is a piece of the Pulsar UI that is outside the editor space. Panels tend to live in one of the docks on the left, right, or bottom of the workspace.
Examples:
- The find and replace interface
- The keybinding resolver information view
Command palette
In the welcome screen shown above, we are introduced to one of the most important features of Pulsar: the command palette. If you press Ctrl+Shift+PCmd+Shift+P while focused in an editor pane, the command palette will pop up.
This search-driven menu can do just about any major task that is possible in Pulsar. Instead of clicking around all the application menus to look for something, you can press Ctrl+Shift+PCmd+Shift+P and search for the command.

Not only can you see and quickly search through thousands of possible commands, but you can also see if there is a keybinding associated with it. This is great because it means you can guess your way into doing interesting things while also learning key bindings for doing them more quickly in the future.
For the rest of this documentation, we will refer to commands by name even when they have a default keybinding. We do this because the keybinding can be customized, but the name remains the same no matter what.
Settings and preferences
Pulsar has a number of settings and preferences you can modify in the settings view.

This includes things like changing the theme, specifying how to handle wrapping, font settings, tab size, scroll speed and much more. You can also use this screen to install new packages and themes, as we’ll cover on the page about packages.
To open the settings view, you can
- use the Edit > Preferences Pulsar > Preferences File > Settings menu item in the menu bar,
- search for
settings-view:openin the command palette, or - use the Ctrl+,Cmd+, keybinding.
The settings view is provided by the settings-view package.
Finding settings
If you ever have any difficulty in finding the relevant setting for any part of Pulsar, try the Search pane in the settings view. It allows you to search the names and descriptions of search of all settings, whether in Pulsar core or in an installed package.

Changing the theme
The settings view also lets you change Pulsar’s themes.
Pulsar has two different kinds of themes. UI themes control the style of the interface — the tabs, the tree view, the find-and-replace view, and so on. Syntax themes control the syntax highlighting of files you edit. You can have one of each kind of theme active at once.
Themes can be changed in the Themes pane of the settings view. To change your UI theme or syntax theme, simply pick something different in the appropriate dropdown list.
Pulsar ships with four different UI themes: dark and light variants of Atom’s original theme (called Atom Dark and Atom Light) and an updated theme (called One Dark and One Light). Pulsar ships with eight different syntax themes.

If you want to see what else is available, you can use the Install tab to browse community packages for both kinds of themes in the Pulsar Package Registry.
You can even make your own themes! Customizing a theme (in Style tweaks) and creating your own theme (in Developing a theme) will be covered later.
Soft wrap
You can use the settings view to specify your whitespace and wrapping preferences. These settings are available in the Editor pane.
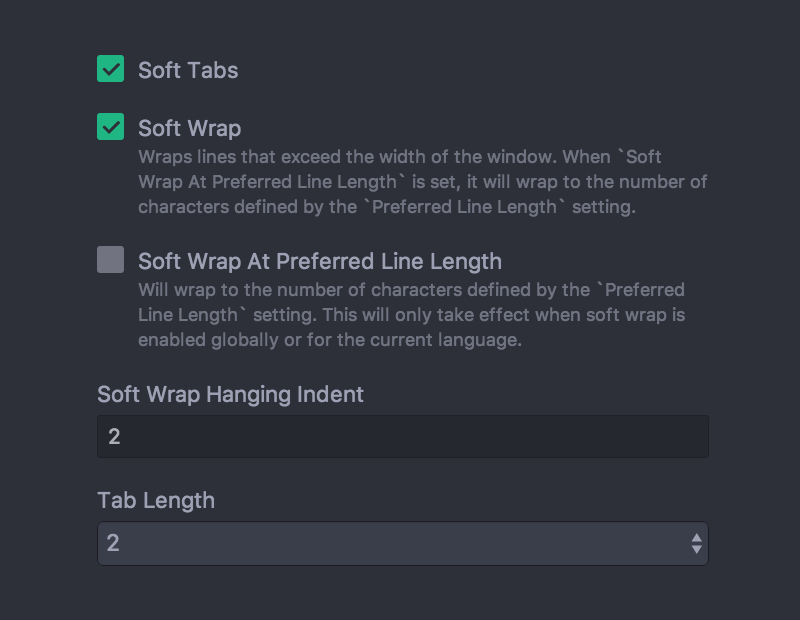
Enabling Soft Tabs (editor.softTabs) will insert spaces instead of actual tab characters when you press the Tab key. The Tab Length setting (editor.tabLength) specifies how many spaces to insert when you press Tab (when Soft Tabs is enabled) or how many spaces are used when rendering a tab character (when Soft Tabs is disabled).
The Soft Wrap option (editor.softWrap) will wrap lines that are too long to fit in your current editor pane. If Soft Wrap is disabled, these lines will simply run off the edge of the pane, and you’ll have to scroll horizontally to see the rest of the line.
If Soft Wrap At Preferred Line Length (editor.softWrapAtPreferredLineLength) is enabled, lines will soft-wrap at the preferred line length — 80 characters by default — instead of using the full width of the editor pane. And, of course, that 80-character default can be configured with the Preferred Line Length setting (editor.preferredLineLength).
What if you want something more complicated? For instance, maybe you prefer soft tabs in most languages, but hard tabs in Python. Luckily, any editor-related setting can also be applied on a per-language basis.
Opening, modifying, and saving files
Now that your editor is looking and acting how you want, let’s start opening up and editing files. This is a text editor after all, right?
Opening a file
There are several ways to open a file in Pulsar. You can do it by choosing File > Open from the menu bar or by pressing Ctrl+O Cmd+O to choose a file from the standard dialog.

This is useful for opening a file that is not contained in the project you’re currently in (more on that next), or if you’re starting from a new window for some reason.
Another way to open a file in Pulsar is from the command line using the pulsar command.
You can run the pulsar command with one or more file paths to open up those files in Pulsar.
$ pulsar --help
> Pulsar Editor v1.100.0

> Usage: pulsar [options] [path ...]

> One or more paths to files or folders may be specified. If there is an
> existing Pulsar window that contains all of the given folders, the paths
> will be opening in that window. Otherwise, they will be opened in a new
> window.

> ...
This is a great tool if you’re used to the terminal or you work from the terminal a lot. Just fire off pulsar [files] and you’re ready to start editing. You can even open a file at a certain line (and optionally column) so the cursor will be positioned exactly where you want. For example, you may search some keyword in a repository to find the line you want to edit:
$ git grep -n 'Opening a File$'
gettings-started/sections/pulsar-basics.md:130:#### Opening a File
and then jump to the beginning of that line by appending a colon and the line number to the file path:
$ pulsar getting-started/sections/pulsar-basics.md:130Sometimes you may want to cursor to jump to the exact column position of the searched keyword. Just append another colon plus the column number:
$ git grep -n --column 'Windows Explorer'
getting-started/sections/pulsar-basics.md:150:722
$ pulsar getting-started/sections/pulsar-basics.md:150:722
Editing and saving files
Editing text in Pulsar will feel familiar. You can click around and scroll with your mouse and type to change the content. There is no special editing mode, and the default key bindings for common tasks match the default bindings for your system.
If you prefer editors with modes or more complex key commands, you should take a look at the Pulsar Package Registry. There are a lot of packages that emulate popular styles.
To save a file, you can choose File > Save from the menu bar or Ctrl+SCmd+S to save the file. If you choose File > Save As or press Ctrl+Shift+SCmd+Shift+S then you can save the current content in your editor under a different file name. Finally, you can choose File > Save All or press Alt+Cmd+S to save all the open files in Pulsar.
Opening Directories
Pulsar doesn’t just work with single files, though! It’s likely you’ll spend most of your time working inside of a project that contains multiple files.
To open a directory, choose the menu item File > Open FolderFile > Open and select a directory from the dialog. You can add additional folders to your current Pulsar window by choosing File > Add Project Folder from the menu bar or pressing Ctrl+Shift+ACmd+Shift+O.
You can open any number of directories from the command line by passing their
paths to the pulsar command line tool. For example, you could run the command
pulsar ./hopes ./dreams to open both the hopes and the dreams directories
at the same time.
When you open Pulsar with one or more directories, you will automatically get a Tree View on the side of your window.

The Tree View allows you to explore and modify the file and directory structure of your project. You can open, rename, delete and create new files from this view.
You can hide and show the tree view with Ctrl+\Cmd+\ or the Tree View: Toggle command from the command palette. Pressing Alt+\Ctrl+0 will move focus to the tree view.
When the tree view has focus, you can use the arrow keys to navigate through the tree. You can also press A, M, or Delete to add, move, or delete files and folders.
You can also right-click on a file or folder in the tree view to see these options and others — such as revealing the file in your system’s file browserthe FinderWindows Explorer or copying the file path to the clipboard.
Opening a file in a project
Once you have a project open in Pulsar, you can easily find and open any file within that project.
You can open the fuzzy finder with Ctrl+T or Ctrl+PCmd+T or Cmd+P. You can then start typing the file name of whatever file you’d like to open — or just type any part of the file’s path to narrow down the results shown in the list.

You can also press Ctrl+BCmd+B to search through only the files that are currently opened, instead of every file in your project. Or you can use Ctrl+Shift+BCmd+Shift+B to search only the files which have been modified or added since your last Git commit.
The fuzzy finder uses the core.ignoredNames, fuzzy-finder.ignoredNames and core.excludeVCSIgnoredPaths configuration settings to filter out files and folders that will not be shown. If you have a project with tons of files you don’t want it to search through, you can add patterns or paths to either of these config settings. If your project is also a repository, the core.excludeVCSIgnoredPaths setting controls whether Pulsar will ignore files that are specified in .gitignore files and their equivalents in other common VCS systems.
We’ll learn more about config settings in Global configuration settings, but for now you can easily set these in the Settings View under Core Settings.
Both core.ignoredNames and fuzzy-finder.ignoredNames are interpreted as glob patterns as implemented by the minimatch Node module.
The fuzzy finder is provided by the builtin fuzzy-finder package.
Proxy and firewall settings
Behind a firewall?
If you are behind a firewall and seeing SSL errors when installing packages, you can disable strict SSL by running:
$ pulsar -p config set strict-ssl falseUsing a proxy?
If you are using a HTTP(S) proxy, you can configure ppm to use it by running:
$ pulsar -p config set https-proxy <YOUR_PROXY_ADDRESS>You can run pulsar -p config get https-proxy to verify it has been set correctly.